Understand the results page
After you submit a search, PEP opens a results page containing the matching documents. The summary at the top describes the current result set, while each result gives you bibliographic information and actions for that record.
When PEP can identify text that matched your query, it shows one or more snippets beneath the bibliographic information. These passages help you judge why a document appeared before opening the complete text. A snippet belongs to the result above it; it is not a separate document.
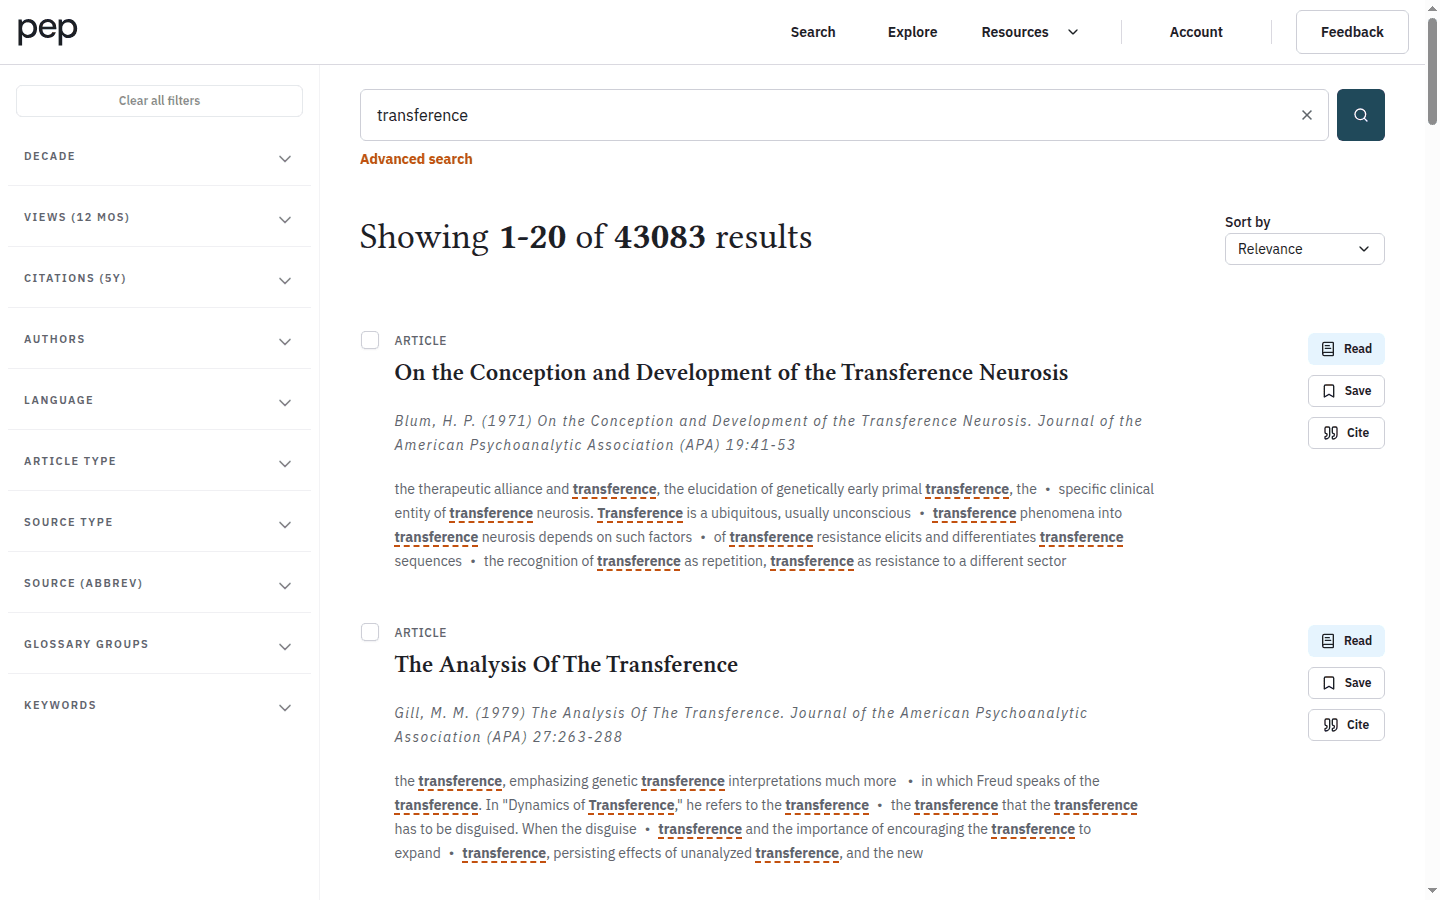
Result counts and ordering can change as the archive grows. Use the visible evidence in each record rather than relying on a count from an earlier search.
Change the order
Open Sort by when another order will help you review the set. Relevance is the normal starting point for a topic search. Other choices include Author, year, title; Year (newest); Year (oldest); Author only; Title; Source only; Citations; Views; and Source, year, issue, page.
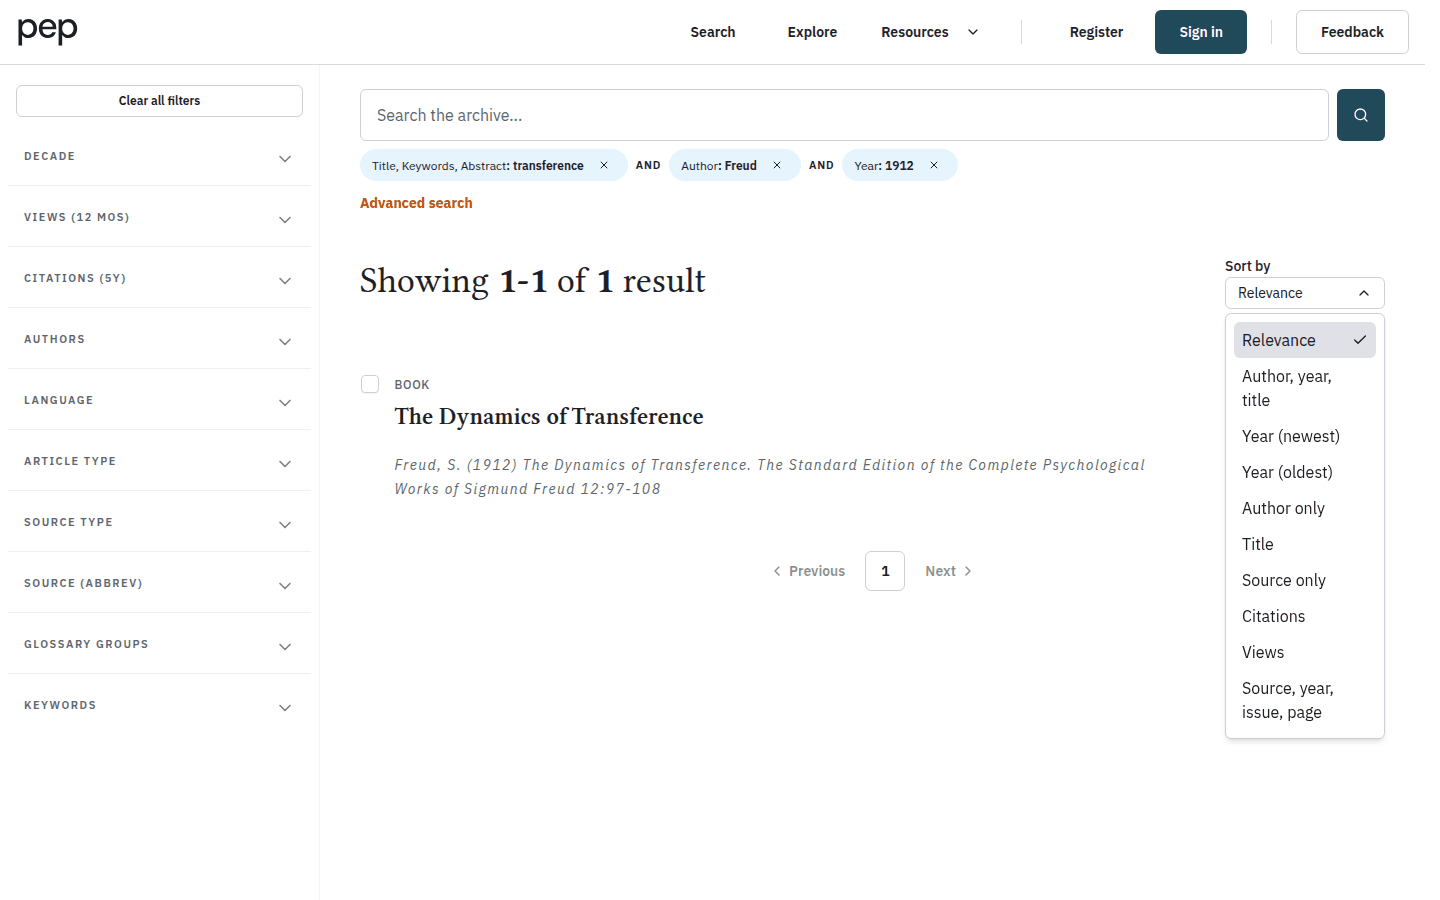
For historical research, Year (oldest) can reveal the earliest material first. Citations and Views can highlight influential or frequently consulted records, but they should complement rather than replace your assessment of relevance.
Narrow the set with filters
Use Filters to focus on a meaningful part of a broad result set. On a desktop screen, the filter groups appear beside the results. Available groups can include Decade, Views (12 mos), Citations (5y), Authors, Language, Article type, Source type, Source (abbrev), Glossary groups and Keywords.
- Open a filter group and select a value.
- Notice that PEP refreshes the result set and adds an active filter chip above the results.
- Add another value if it represents a useful part of the question.
- Remove an individual chip to undo that choice, or select Clear all filters to return to the unfiltered search.
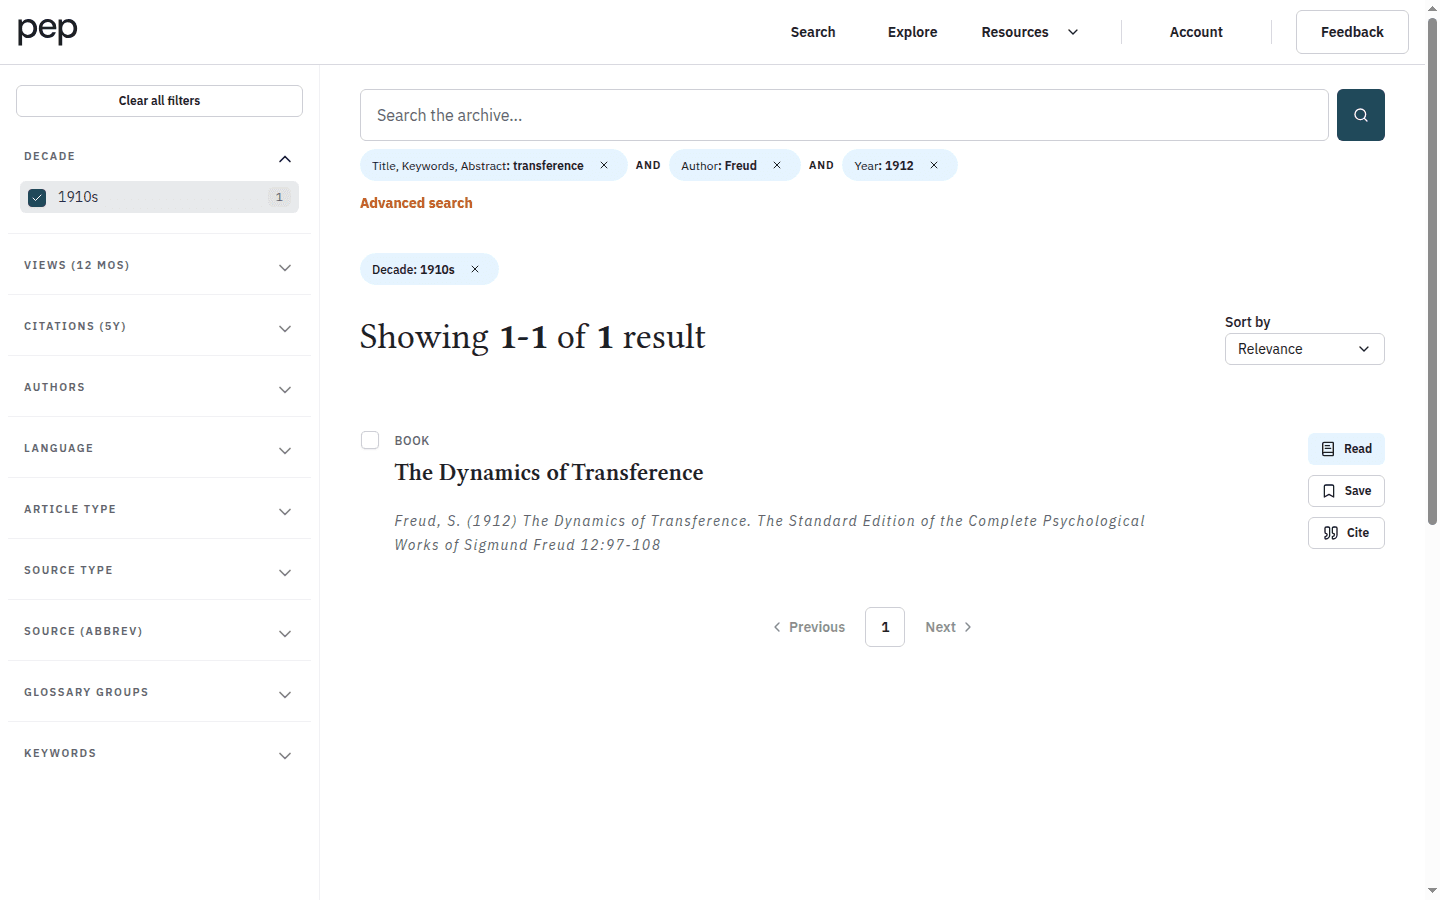
Filters are combined with the search itself. If the set becomes too small, remove the most restrictive filter before changing the original query.
Work with individual results
Select a title to open the document. The Save action adds a record to My Research, while Cite opens the citation tools. Saving requires a signed-in account; citation export is also available from the document itself.
The results page is organised around individual records and deliberate selections. Work with one record, or select the group you intend to save or cite.
Select several records
Use the checkbox beside a result when you want to act on several records together. The selected-results action bar shows how many records are selected and offers Save selected and Cite selected. You can also use Select all, then clear the selection when you have finished.
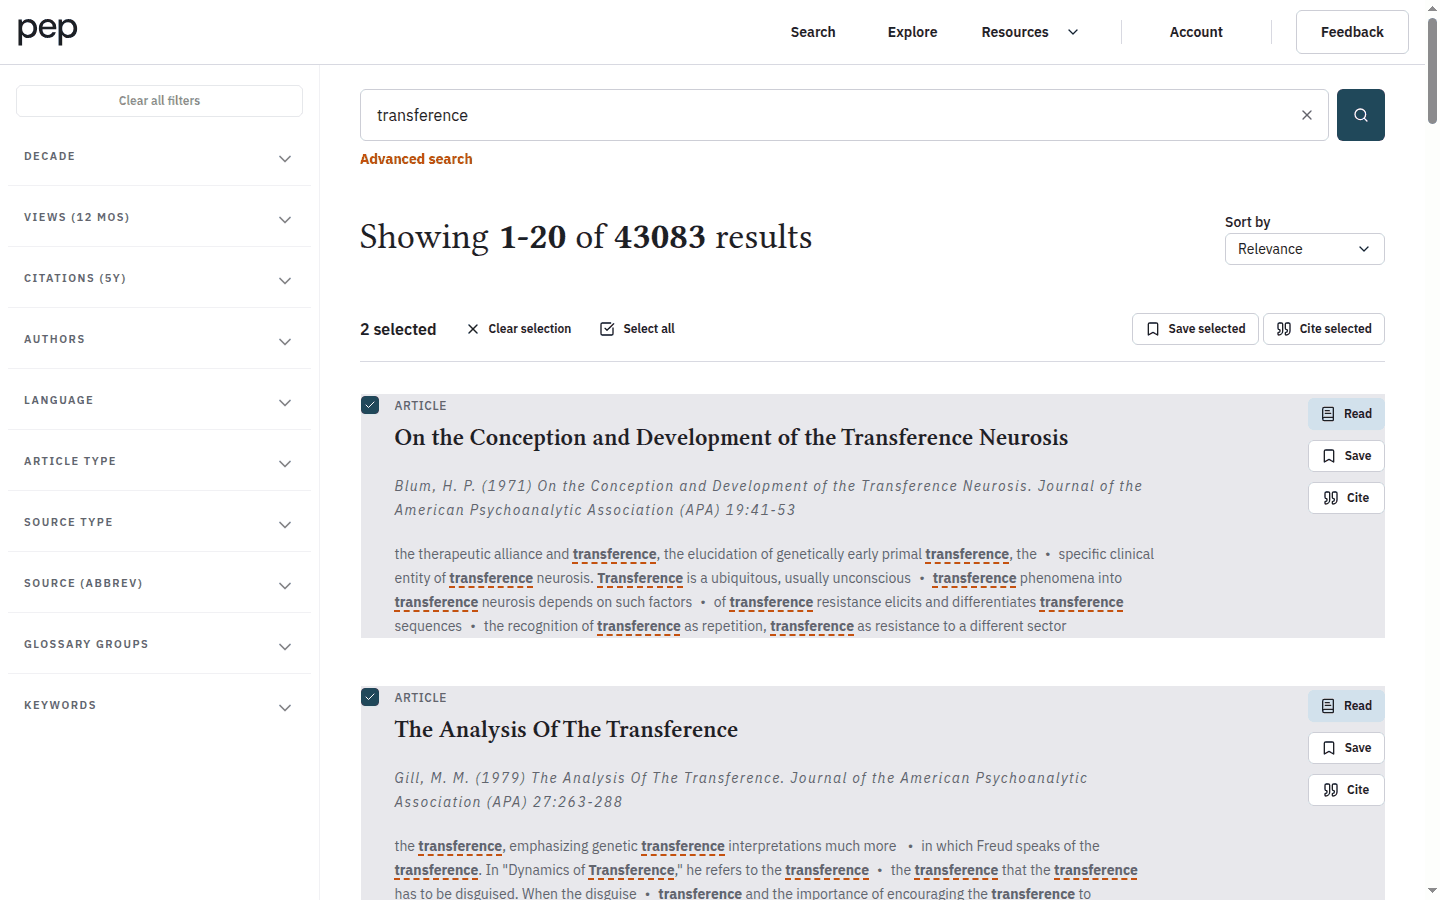
Save selected records
Select Save selected to choose a My Research list. You can use an existing list or create a new one from the dialog. A record can belong to more than one list, which is useful when one article contributes to several projects.
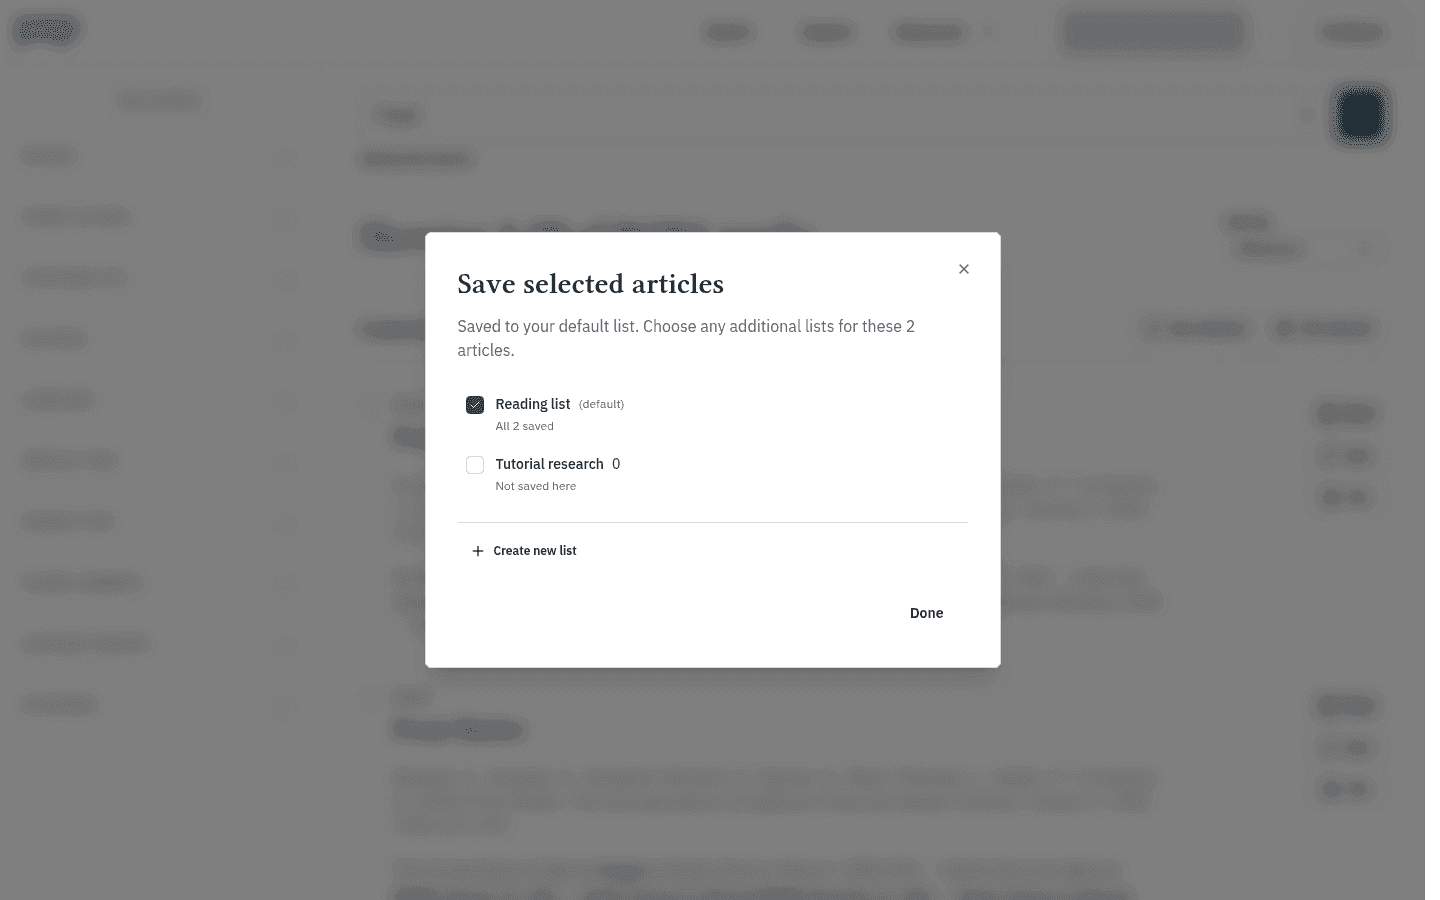
The default Reading list is the automatic destination; custom lists let you organise the same records around a project or topic.
Cite selected records
Select Cite selected to open a citation preview for the group. Choose the format required by your reference manager or writing workflow, then use Copy or Download.
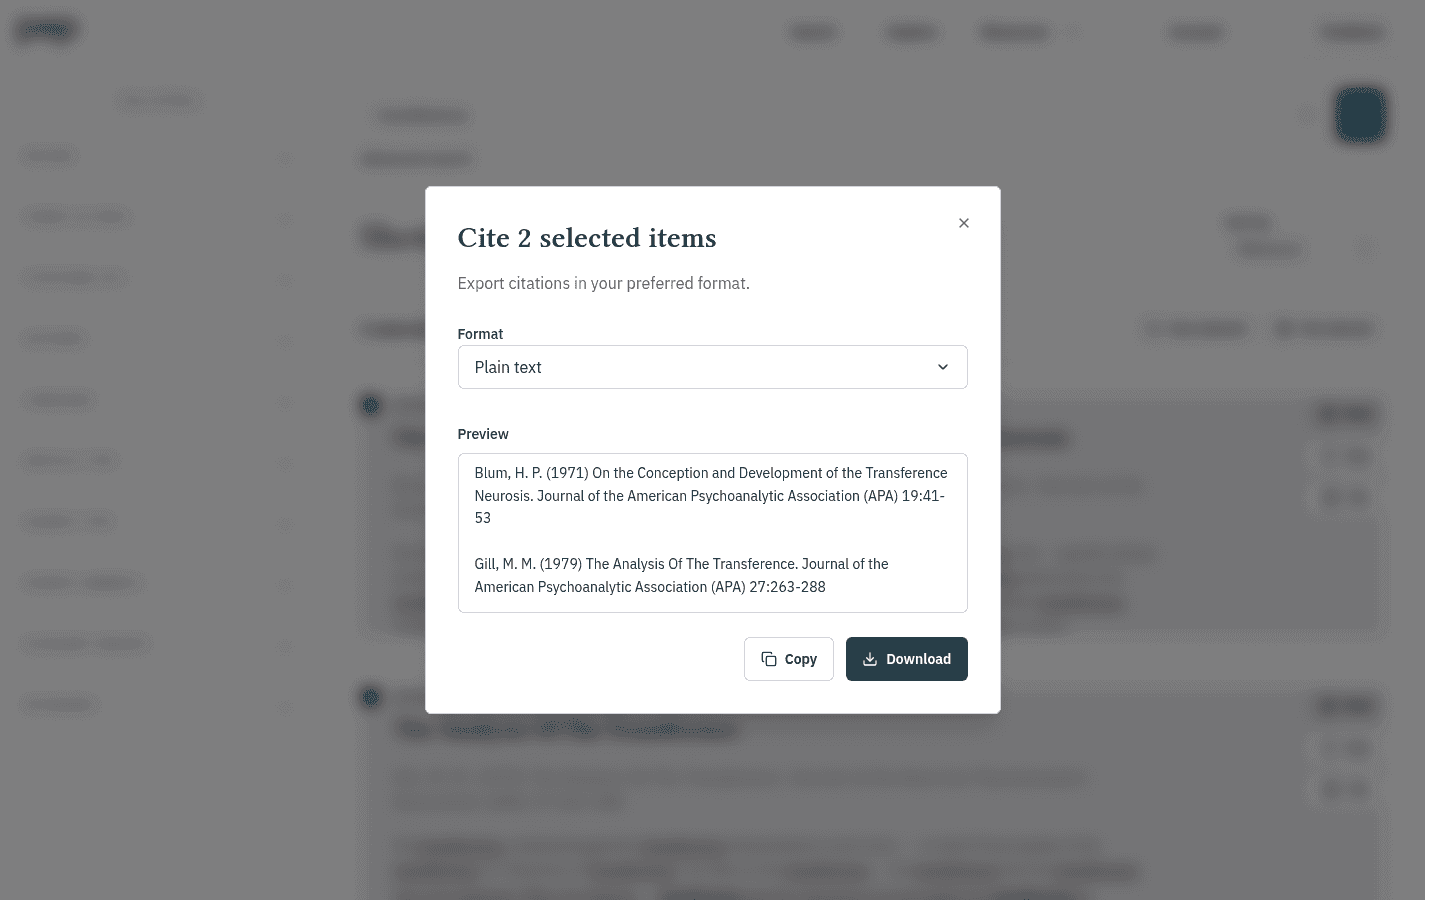
Citation metadata can vary between records, so check the exported text against the style or data requirements of your project.
Return from a document
When you open a document from results, use Back to search results to return to the set. This route preserves the search context and is preferable to starting the query again.
Next steps
Reading and Navigating a Document explains how to use the reader and its Search hits panel. For a fuller account of formats, continue with Downloading and Citing Content. If you want to organise the records you saved, open My Research: Saving and Organising Articles.